When you open Microsoft Outlook, it will usually open in the Email view – to switch to Calendar view, simply click the calendar symbol at the bottom left of the screen:
Calendar view

The recommended method for scheduling a meeting and inviting required attendees is as follows:
1. Set up the Meeting
- In Calendar view, select the New Meeting button on the tool bar
- Enter the Subject and Location of meeting
- Set your preferred Start and End date and time
- Include any meeting details such as agenda, purpose, etcetera, in the message box
2. Select Attendees
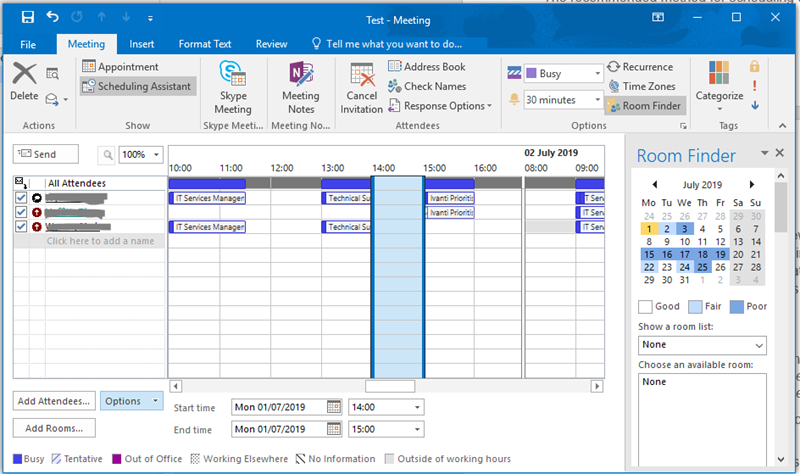
- Select Scheduling Assistant
- Add the names of the required attendees in the column on the left-hand side:
If you are not sure if you have entered the correct name or names, select Check Names in the toolbar
The screen display will look similar to the screen shot:
3. Don’t forget the room!
Some rooms are available to book through Outlook (for example in Exchange Station). You can click ‘Add Rooms’ to browse the available locations that may be suitable for your meeting. You can add these rooms to the meeting in a similar way to adding a person. Some rooms are set to automatically send you a reply straight away if the room is not already booked, and for others, you will have to wait until somebody has reviewed and confirmed your request.
If the room you need is not available in Outlook, it may be possible to book it via the Timetabling team (Email: Non-TeachingRoomRequests@ljmu.ac.uk to make your request). Library Seminar rooms can be booked via The Library. You should check locally how the rooms in your area are booked.
You can update the location of the meeting once it has been confirmed. It’s a good idea to allow a few days to confirm the room rather than assuming it will be available. Always update the location of your meeting on the appointment if it changes after the invitation has been sent.
4. Check Attendee Availability
The horizontal bars alongside each attendee show the times at which they already have diary commitments. The vertical highlighted section indicates your chosen time for the meeting. If none of the horizontal bars intrude into this zone the all attendees are available for the meeting, but please refer to the etiquette tips above regarding choosing an appropriate time.
If your chosen time is not suitable, the AutoPick feature can help you to select a different time. Select Options followed by AutoPick and select the most appropriate choice:
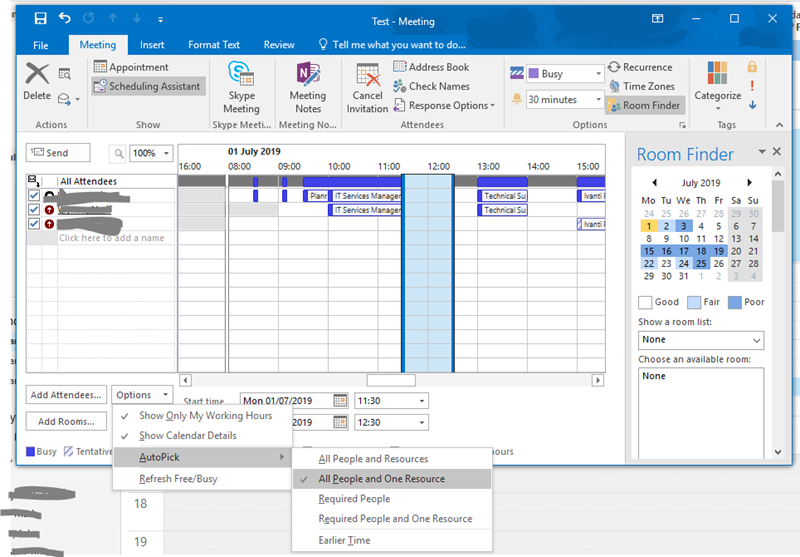
The scheduling system will automatically find the next time at which your selection of attendees and resources are available for the meeting.
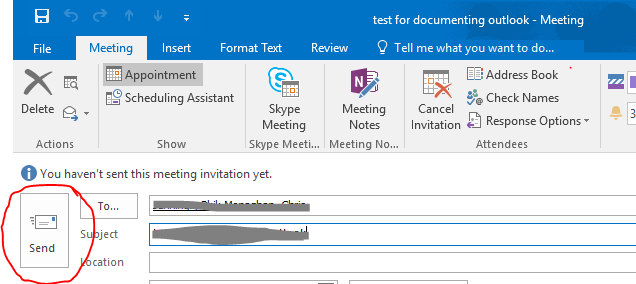
5. Send the invitation
Select Appointment in the toolbar to Switch back to the appointment view and select the Send button.
- Put the meeting details in your diary.
- Put the meeting details in each of the invited attendees’ (and resources’) diaries as a "tentative" meeting.
- Send an email to each invited attendee; notifying them of the meeting and requesting them to Accept or Decline the invitation.
As meeting organiser you will be notified by email of each response to the meeting request.
By default, other users of the diary and scheduling system can only see whether you are free or busy – in the form of the horizontal bars displayed when checking the availability of invited attendees as part of the meeting scheduling process.
For some colleagues, typically within your own department, the ability to see the actual detail of any meeting in your schedule can be very useful, for example:
- when dealing with your unexpected absence due to sickness – enabling people you had arranged meetings with to be notified
- when scheduling a meeting with you, to check whether an adjacent meeting might make it difficult for you to attend the one they are trying to arrange
- to enable a colleague to contact you in an emergency
The principle of allowing colleagues to see the details of appointments in you electronic diary is exactly analogous to allowing others to check your desk diary when you are out of the office.
You can make your diary viewable, but keep some things private
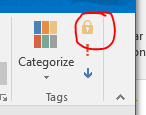
If you want the details of a particular appointment to remain private (for example you might have a meeting to discuss a confidential matter), just select the ‘Private’ button in the appointment.
The block of time will show to others as busy, with the label ‘Private Appointment’. Only you will be able to see the full details of your private appointment, regardless of who you allow to view your calendar.
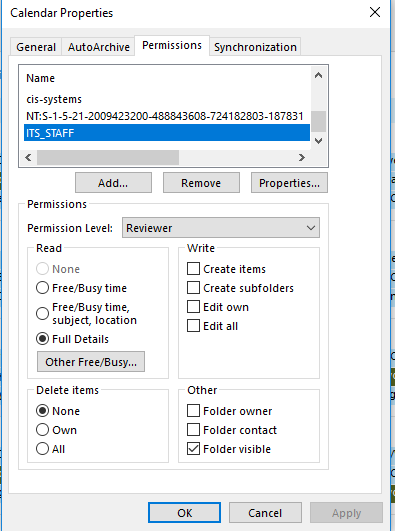
Making details of your appointments accessible to colleagues
- In Calendar view, select Folder in the top menu
- Select the Calendar Permissions button
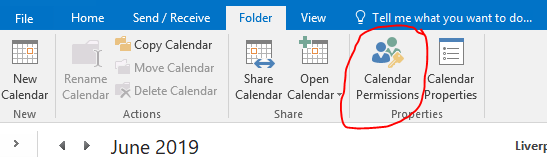
- Select Add button
- In the Search box (top left), enter your "departmental email group name" - for department XXX this will be XXX-STAFF, for example ITS_STAFF, CMS_STAFF, etcetera. and select OK.
- Set the Role for this group to Reviewer
- Select OK
The example (above) shows what the Calendar Properties look like for a user who wants to allow members of staff in ITS to be able to read the details of their meetings.
It is normal practice for diary users to enable colleagues in their department to view the details of their appointments. Assuming this practise has been followed you can view the details of a colleague (non-private) schedule as follows:
- From the Calendar view, select Open Calendar on the toolbar, then ‘Open Shared Calendar’
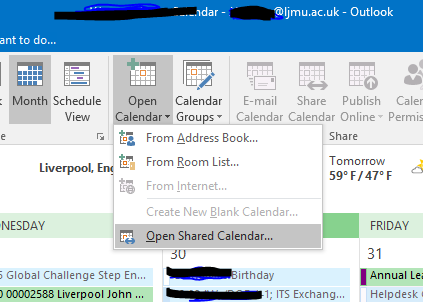
- Enter the name of the colleague whose calendar you wish to view (or click the Name button to select them from the address book).
- Select OK
View details when scheduling a meeting
Right-click on the horizontal bar displayed when checking attendee availability status during the meeting scheduling process to display the details of that meeting for that individual.
